Creating an English to Shakespeare Translation AI
This project was supposed to do have a lot more bells and whistles, not just a simple translation model. But as the time investment started getting bigger and bigger. I had to cut my losses.
The model I created translates normal English into Shakespeare English. But the original idea was to generate Eminem lyrics written in a Shakespeare style. A bit much right? 😅
While I may start working on the original features of the project later on. I think it’s a good idea to show the progress I have right now.
Starting The Project First Time Round
The first step I did was working on the Shakespeare translation element. I did a fair amount of googling trying to find projects similar to mine. So I have an idea of what others did for their projects. I eventually found a project which translates Shakespeare English and normal English. The most important part I found was their data. A corpus of various Shakespeare plays in Shakespeare English and normal English.
Now, this is where I drove myself into a ditch. I knew for the translations task I wanted to create an RNN but the code in GitHub was highly outdated. So wanted to find another tutorial that I could use for the model. I was able to find some. But lead to more pre-processing work.
The first step was knowing what type of data I was dealing with. Because the data was not the normal txt file. It took me a while to even work out how to access the file. I was able to access it by converting it into a normal txt file. Little did I know that caused me more problems down the line.
As I was working with a language translation model. I needed the data to be parallel in some type of way. As the words need to match from one list to another list. The problem is when I was doing previews of the text. The text was non-aligned and I was never able to fix it. This pre-processing period added multiple hours to the project. Only to lead to a dead end.
Trying to encode the sequences led to me burning hours of my time. I tried to do it in various ways. Using NLP libraries like Spacy. To using more minor libraries like PyTorch-NLP. To finally following the tutorial’s Keras library. When I eventually found workarounds it led to big memory issues. As it was trying to encode the whole dataset. Even using small batches it still increased pre-processing by a high amount.
The main issues stemmed from me doing a hack job pre-processing the data. Using various libraries conflicting with each other leading to data type errors, memory issues and high pre-processing time. As I wanted to create my model using Pytorch. Using other libraries like Keras was for pre-processing. Not for modelling. But the conflict between half doing the tutorial and my customisations lead to more problems.
A new approach
So, I decided to abandon ship and create a new notebook. Using a new model from a Pytorch tutorial and accessing the files directly without converting them to a text file.
From the previous notebook. I learnt you can access the snt files without converting them into a txt file. Also, I tried using various other language translation code. But led to long pre-processing times, memory issues or long training times.
In the new notebook, I imported all the data files GitHub repo produced. By following the repo’s instructions and updating the code. The pre-processing was a lot more organised as I learnt a few mistakes from the previous notebook. While most of the data files did not get used. It was easier to access the data that I needed and easier to make changes to them.
The processing of the text was aligned correctly. Fixing the main problem of the last notebook.
#Aglined dev and train files
modern_dev_aligned_path = '/content/cloned-repo/cache/all_modern.snt.aligned_dev'
modern_train_aligned_path = '/content/cloned-repo/cache/all_modern.snt.aligned_train'

modern_dev_aligned_file = open(modern_dev_aligned_path, "r")
modern_train_aligned_file = open(modern_train_aligned_path, "r")

content_modern_dev_aligned = modern_dev_aligned_file.read()
content_modern_train_aligned = modern_train_aligned_file.read()

modern_dev_aligned_list = content_modern_dev_aligned.split("\n")
modern_train_aligned_list = content_modern_train_aligned.split("\n")

modern_dev_aligned_file.close()
modern_train_aligned_file.close()

print(modern_dev_aligned_list[:10])
print('\n ----------- \n')
print(modern_train_aligned_list[:10])
['It’s not morning yet.', 'Believe me, love, it was the nightingale.', 'It was the lark,
-----------

['I have half a mind to hit you before you speak again.', 'But if Antony is alive, healthy, friendly with Caesar,
#Aglined shak dev and train files
shak_dev_aligned_path = '/content/cloned-repo/cache/all_original.snt.aligned_dev'
shak_train_aligned_path = '/content/cloned-repo/cache/all_original.snt.aligned_train'
shak_dev_aligned_file = open(shak_dev_aligned_path, "r")
shak_train_aligned_file = open(shak_train_aligned_path, "r")
content_shak_dev_aligned = shak_dev_aligned_file.read()
content_shak_train_aligned = shak_train_aligned_file.read()
shak_dev_aligned_list = content_shak_dev_aligned.split("\n")
shak_train_aligned_list = content_shak_train_aligned.split("\n")
shak_dev_aligned_file.close()
shak_train_aligned_file.close()
print(shak_dev_aligned_list[:10])
print('\n ----------- \n')
print(shak_train_aligned_list[:10])
['It is not yet near day.', 'Believe me, love, it was the nightingale.', 'It was the lark, the herald of the morn; No nightingale.' …]
-----------
['I have a mind to strike thee ere thou speak’st.', 'Yet if thou say Antony lives, …]After working out the pre-processing I started implementing the seq2seq model from Pytorch.
While following the Pytorch tutorial, I needed to do a bit more pre-processing of the data. So data can fit into the model. To do that, I needed to make my dataset was in a similar format that the tutorial’s data provides.
Like so:
I am cold. J'ai froid.I turned the separate lists of Shakespeare text and modern text into tuples. So each line of text is paired to its Shakespeare and modern text equivalent. Then I added tab characters in between the entries. To mimic the format of the tutorials data. But that did not work. So I just kept it to tuples which worked fine.
Later I came to set up the model. When I started to run the training function. It gave me an error.

This led to a wormhole of me spending days trying to debug my code. I eventually fixed the various bugs. Which was me not using the filter pairs functions. As it capped the sentences to a max length. Without that, longer sentences were entering the model. This caused errors as the code was designed to take in sentences only of the max length variable.
MAX_LENGTH = 10

eng_prefixes = (
    "i am ", "i m ",
    "he is", "he s ",
    "she is", "she s ",
    "you are", "you re ",
    "we are", "we re ",
    "they are", "they re "
)


def filterPair(p):
    return len(p[0].split(' ')) < MAX_LENGTH and \
        len(p[1].split(' ')) < MAX_LENGTH and \
        p[1].startswith(eng_prefixes)


def filterPairs(pairs):
    return [pair for pair in pairs if filterPair(pair)]
The only thing I changed was the use of eng_prefixes as it was not relevant to my data. And reduced my dataset to two sentences which was non-usable for training.
After that, I just had to fix a few minor issues plotting charts and saving the weights.
The results after a few attempts:


> You’re making me go off-key.
= Thou bring’st me out of tune.
< What me me here. <EOS>

> Go away!
= Away!
< Away! <EOS>

> Gentlemen, we won’t stay here and anger you further.
= Gentlemen both, we will not wake your patience.
< Tis we will not not you your <EOS>

> A little bit.
= A little, by your favor.
< A good or <EOS>

> You were right the first time.
= You touched my vein at first.
< You do the the the <EOS>

> Where are these lads?
= Where are these lads?
< Where are these these <EOS>

> You’ve heard something you shouldn’t have.
= You have known what you should not.
< You have said you have you true. <EOS>

> Or else mismatched in terms of years;— Oh spite!
= Or else misgraffed in respect of years— O spite!
< Or is a dead, of of of <EOS>

> Oh why, nature, did you make lions?
= O wherefore, Nature, didst thou lions frame?
< O wherefore, Nature, didst thou didst <EOS>

> Come down, look no more.
= Come down, behold no more.
< Come weep no more. <EOS>
input = I go to work.
output = I go to your <EOS>
The results of this model have a lot to be desired. But I’m happy to get a working model up and running. I can improve the results even more by increasing iterations and increasing the data sent to the model. The Google Colab GPU allows me to get a decent amount of training done. But there is a bug which states runtime has stopped while the model is still training. Luckily the runtime comes back after training. But I don’t know the times the runtime does not come back, therefore, cutting off my training.
Find this Project Interesting?
Get project updates and ML insights straight to your inbox
So I can make the project slightly more visual. I created a Streamlit app where the user can input text and the translation will be returned. I honestly wanted it to look like google translate. But I don’t know how to do that.
I had to find a good example of a translation project. As I never used Streamlit before. I was able to find this repo. I used this as the basis for my Streamlit app.
I first needed to load this repo to launch its Streamlit app. So I can get a feel on how the Streamlit app works so I will have an idea how to edit the repo for my model.
Loading the Streamlit app took a lot of work. Because Streamlit did not install in my local machine in the beginning. So I opted to use Google Colab. But because Streamlit works by routing via localhost. Which I can’t do directly using Google Colab. I had to find a way to host local addresses inside Google Colab.
I found this medium article. Which suggested I used the Ngrok service to create a tunnel to route the streamlit local address to a public URL.
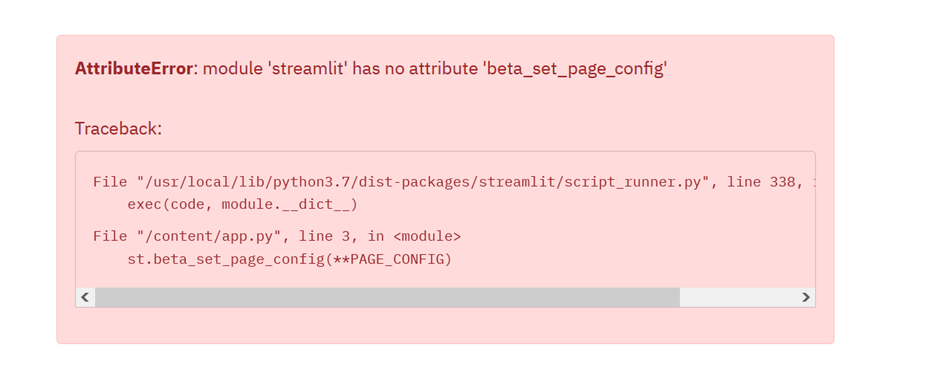
After a bit of fiddling around, I was able to run the app. The only problem is that python started giving me errors in Streamlit. Which looked like this:
After a few fixes I was able to get the repo’s Streamlit app running:

Now I had to replace the repo’s TensorFlow model with my Pytorch model. I knew this was going to be a daunting task. And I was proved right. As I was hit with numerous errors and roadblocks when setting it up.
One of the most time-consuming tasks was loading objects I had from the notebook into the Streamlit app. As I had pickled objects this lead to errors because it was from the __main__ namespace. So I had to create a custom unpickler class.
Loading the model was easier and I was able to test it on my local machine first. Loading the model on the Google Colab version led to some issues but I was able to fix them. As these were minor issues like incorrect paths to the objects and model and making sure the model loaded on a CPU device rather than a GPU device.
Afterwards, I was able to get some results:

Later on, I added a random pairs button that would show multiple examples in one go:

Adding the random pairs feature took a bit of adjusting. As multiple errors came up with the decoding of the text.
After I fixed the encoding issues I moved on to implementing the attention matrices.

Conclusion
I mentioned this at the beginning of the blog post. This project had a much bigger scope. But had to be cut. So, I may implement the second part of this project later on. Which was generating Eminem lines and feeding them into the Shakespeare translation model.
After this project, I want to do a lot more reading about RNNs. Because I don’t think my knowledge is up to scruff. So I would do various things like implementing RNNs using NumPy. Implementing some RNN related papers. And learning the maths required to understand the topic. Hopefully taking these actions should improve my understanding of RNNs and deep learning in general.
If you found this article interesting, then check out my mailing list. Where I write more stuff like this